Bathroom Remodel Order of Operations: The Right Sequence
- Bathroom remodels follow a strict sequence — skipping or reordering steps creates expensive rework and code violations
- Planning and permits come first; demolition without an approved permit can result in stop-work orders and fines
- Rough-in plumbing and electrical must be inspected before walls are closed — inspectors cannot sign off on hidden work
- Waterproofing the shower area before tile is non-negotiable; failures cause mold inside walls within 6–18 months
- A full bathroom remodel takes 3–6 weeks from demo to final walkthrough when the sequence is followed correctly
- Most costly mistakes happen when homeowners or contractors rush — tiling before waterproofing cures, or installing fixtures before painting
Why Sequence Matters in a Bathroom Remodel
A bathroom contains more trades working in a smaller space than almost any other room in a house. Plumbers, electricians, tile setters, carpenters, and painters all have work that must be done in a specific order — and each trade’s work affects what the next trade can do.
Get the sequence wrong and you face one of three outcomes: rework (tearing out completed work to fix what’s underneath), code violations (inspectors rejecting finished assemblies), or premature failure (tile cracking because backer board wasn’t properly set, or mold forming behind tile because waterproofing was skipped).
The 10-step sequence below reflects how licensed contractors and building codes structure the work. It applies to full bathroom remodels — projects involving new tile, plumbing changes, or electrical updates. Cosmetic refreshes (paint, hardware, vanity swap) don’t require this level of sequencing.
Step 1: Planning and Design (Week 1–2)
No tool touches the bathroom until design decisions are finalized and documented. This phase includes:
- Layout decisions: Will plumbing stay in place, or are you relocating the toilet, shower, or vanity? Moving plumbing adds $3,000–$7,000 and affects permit requirements.
- Material selection: Choose tile, fixtures, vanity, and lighting before demo begins. Lead times on custom or specialty items can run 4–12 weeks — ordering late is the most common cause of project delays.
- Budget and contingency: Establish your total budget and reserve 10–15% for surprises found during demolition (mold, rotted subfloor, outdated pipes).
- Contractor selection: Vet and sign with a licensed general contractor or trade-specific subs. See the full bathroom remodel cost guide for what to budget.
Design Documentation Checklist
Before moving to permits, you should have in hand:
- Dimensioned floor plan (even a hand-drawn sketch with measurements)
- Plumbing fixture locations confirmed
- Electrical layout: outlet positions, exhaust fan location, lighting circuits
- Tile layout diagram for shower walls and floor
- All product lead times confirmed
Step 2: Permits (Week 2–3)
Permits are not optional for work involving plumbing, electrical, or structural changes. In most jurisdictions, you need separate permits for:
- Plumbing permit: Required any time supply lines or drain lines are modified
- Electrical permit: Required for new circuits, GFCI outlet installation, exhaust fan wiring
- Building permit: Required if walls are moved, the floor plan changes, or the project scope exceeds a threshold (typically $5,000–$10,000 depending on municipality)
Permit processing times range from same-day (online systems in progressive cities) to 3–6 weeks (older municipalities with paper processes). Factor this into your project timeline.
Step 3: Pre-Demo Prep and Protection (Day 1)
The day before demolition begins, the job site gets prepared:
- Shut off the water supply at the main or the bathroom shutoff
- Shut off electrical circuits serving the bathroom at the panel (verify with a non-contact tester)
- Remove and store any items you’re keeping: medicine cabinet, towel bars, toilet paper holder
- Protect adjacent spaces: hang plastic sheeting in doorways, tape floor protection in hallways leading out of the bathroom
- Establish a debris path from bathroom to dumpster or haul-away vehicle
- Water supply shut off and verified (open a faucet to confirm no pressure)
- All circuits serving the bathroom switched off at panel
- Valuable fixtures (vintage lighting, antique mirror) removed and stored
- Plastic sheeting sealed over doorway opening to contain dust
- Floor protection (rosin paper or Ram Board) taped in hallways and on stairs
- Dumpster or haul bags staged outside or in garage
- Contractor has permit posted and approved drawings on site
- All ordered materials confirmed: tile, vanity, fixtures, backer board
- Neighbors notified of project start (noise, parking for crew vehicles)
- Camera documentation of existing conditions, especially plumbing and electrical
Step 4: Demolition (Days 1–2)
Demolition proceeds from the top down and from finish materials inward:
- Remove toilet (cap the flange)
- Remove vanity and sink (disconnect supply lines and drain)
- Remove tub or shower (fiberglass units come out in one or two pieces; tiled showers require breaking out tile first)
- Strip wall tile and floor tile
- Remove drywall or cement board
- Remove subfloor sections if damaged
- Strip any remaining fixtures, mirrors, lighting
Expect demolition to reveal problems. Mold behind shower walls is found in approximately 35% of bathroom remodels. Rotted subfloor around the toilet base is common, especially in older homes. These discoveries require remediation before new work can proceed — factor 1–3 additional days if remediation is needed.
| What’s Found | Typical Remediation Cost | Added Timeline |
|---|---|---|
| Surface mold (limited area) | $500–$1,500 | 1–2 days |
| Extensive mold behind walls | $1,500–$5,000 | 3–7 days |
| Rotted subfloor (partial) | $500–$1,500 | 1–2 days |
| Galvanized pipe replacement | $1,000–$3,000 | 1–3 days |
| Asbestos tile abatement | $1,500–$4,000 | 2–5 days |
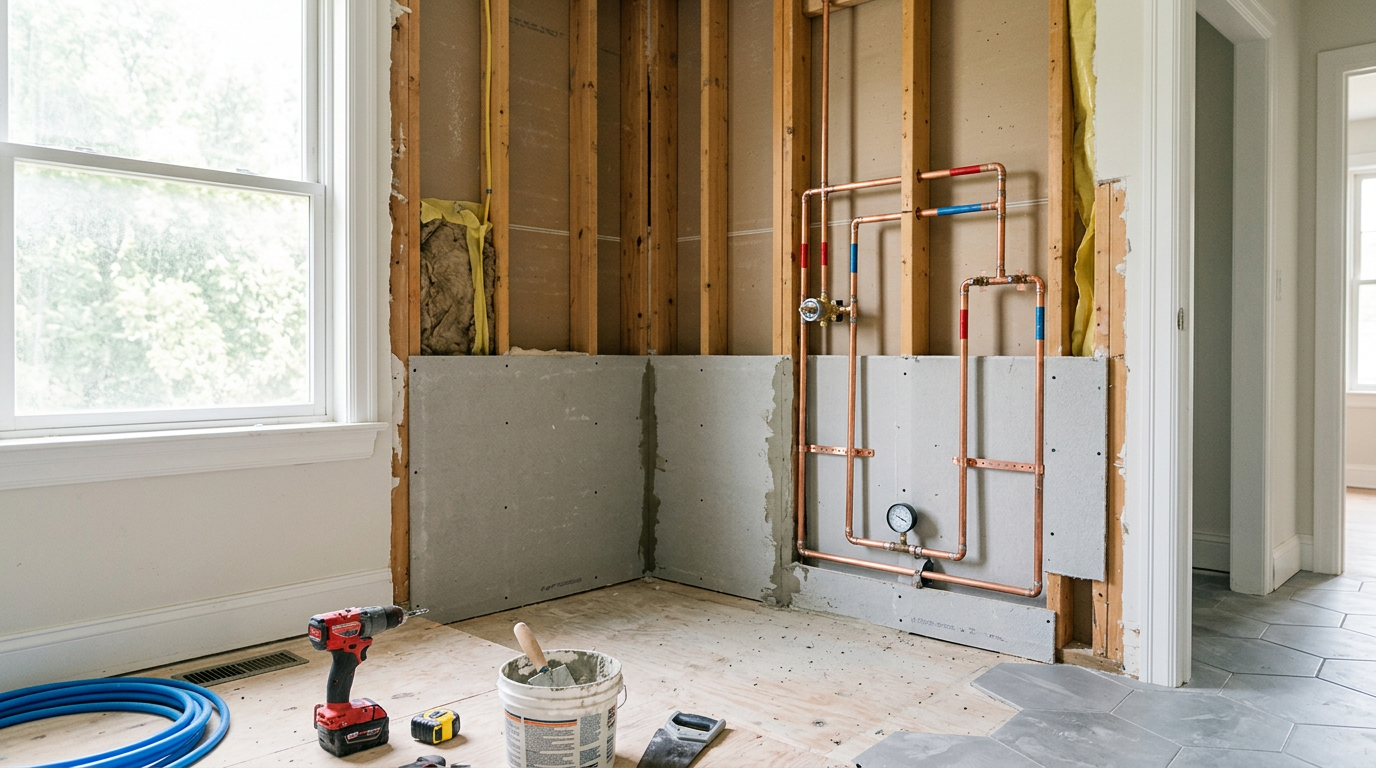
Step 5: Rough-In Plumbing and Electrical (Days 3–6)
With the walls open, rough-in work happens now — before anything is enclosed. This is the correct and only time to do it.
Rough-In Plumbing
- Relocate drain lines and supply lines if the layout is changing
- Set the toilet flange at the correct height for the new finished floor
- Install shower drain rough-in at the correct depth
- Run new supply lines (PEX is standard in new construction and most remodels)
- Cap and pressure-test all lines before closing walls
Rough-In Electrical
- Run new circuits if required (GFCI outlets, dedicated exhaust fan circuit)
- Position outlet boxes, switch boxes, and light fixture boxes
- Run wiring for heated floor systems if included in scope
- Install exhaust fan housing in the ceiling (the fan unit itself installs later)
Step 6: Inspections — Rough-In Sign-Off (Days 6–7)
The building inspector visits to approve rough-in plumbing and electrical before walls are enclosed. This is a non-negotiable checkpoint. No insulation, backer board, or drywall goes up until the inspector signs off.
In some jurisdictions, plumbing and electrical inspections are separate appointments. Plan for both.
What inspectors check at rough-in:
- Drain slope (minimum 1/4 inch per foot for horizontal runs)
- Proper venting of the drain system
- Pressure test on supply lines (no leaks at fittings)
- Wire gauge matches circuit breaker rating
- GFCI protection within 6 feet of water sources
- Exhaust fan vented to exterior (not into attic)
Step 7: Framing, Insulation, and Backer Board (Days 7–9)
With inspections cleared, walls get built out:
- Framing repairs or additions: Blocking for grab bars, niche framing in shower walls, header work if window was modified
- Insulation: Exterior walls get standard insulation; interior bathroom walls sometimes get insulation for sound dampening
- Cement board / backer board: Installed in the shower/tub area and on the floor — anywhere tile will be applied. Cement board (HardieBacker, Durock) does not rot or support mold growth the way drywall does
- Regular drywall: Installed on non-wet wall areas; use moisture-resistant (“green board” or “purple board”) drywall in the bathroom, not standard drywall
Cement board must be fastened with the correct spacing (screws or nails every 8 inches on edges, 12 inches in the field) and joints taped with alkali-resistant mesh tape before waterproofing.
Step 8: Waterproofing (Days 9–10)
Waterproofing is applied to the shower and tub surround before any tile goes up. This step is the single most skipped step in DIY bathroom remodels — and the most consequential.
The two standard approaches:
- Sheet membrane (Schluter Kerdi, RedGard sheet): Seams overlap and are bonded with unmodified thinset; corners get pre-formed membrane pieces; requires no dry time before tiling
- Liquid membrane (RedGard, Laticrete Hydro Ban): Applied with a roller or brush in 2–3 coats; must fully cure (color changes from pink to deep red) before tiling — allow 24–48 hours
The shower floor pan waterproofing is especially critical. Mortar bed pans must be sloped 1/4 inch per foot toward the drain and sealed before tile installation.
Step 9: Tile Installation (Days 10–15)
Tile work proceeds in a specific sub-sequence:
- Shower walls first — set from the centerline outward, starting one tile height up from the floor (the floor tile will tuck under)
- Shower floor — set to drain, maintaining consistent slope; use small-format tile (2×2 or mosaic) for proper slope accommodation
- Bathroom floor — set after shower is complete; larger format tiles (12×24 or 24×24) are typical
- Niche interiors, benches, and curbs — completed last within the shower area
- Grout — applied after thinset cures (minimum 24 hours, 48–72 hours for large-format tiles)
- Grout sealing — 72 hours after grouting; sealant applied to grout lines only (not tile faces)
Tile work is the longest phase of most bathroom remodels. A bathroom with a full tiled shower, tub surround, and floor tile typically takes 4–6 days for an experienced tile setter, plus cure time.
For more on shower design decisions that affect the tile sequence, see the walk-in shower vs. tub comparison.
Step 10: Drywall Finishing and Painting (Days 12–16)
Painting happens before fixtures are installed — this is the correct sequence. Non-wet walls that received drywall during Step 7 get finished now:
- Tape and mud drywall joints (2–3 coats, sanding between each)
- Prime all drywall — critical step that prevents paint from soaking unevenly into fresh mud
- Paint walls, ceiling, and any trim that was disturbed
- Allow paint to fully cure before fixture installation (24–48 hours minimum)
Painting before fixtures means no masking around a toilet, no cutting in around an installed vanity, and no risk of dripping on a finished tile floor. It’s faster and produces a cleaner result.
Step 11: Fixture and Vanity Installation (Days 16–19)
With paint cured and tile grouted, finish elements go in:
- Vanity cabinet: Set and leveled, secured to wall studs
- Countertop and sink: Set in cabinet; undermount sinks require silicone and support clips
- Toilet: Set on flange with new wax ring; supply line connected
- Shower valve trim and showerhead: Trim plates, handles, and showerhead installed over rough-in valve
- Tub spout and faucet (if tub was retained or replaced)
- Exhaust fan grille: Snapped or screwed onto housing installed in Step 5
- Lighting fixtures: Connected to rough-in boxes; require an electrician if new wiring is involved
- Mirrors and medicine cabinet
- Towel bars, toilet paper holder, grab bars: Blocking installed in Step 7 ensures these hit studs
Step 12: Final Connections, Cleanup, and Inspection (Days 19–21)
The final phase closes out the project:
- Final plumbing connections: Supply lines to toilet and sink; drain traps under sink
- Final electrical connections: Secure lighting, verify all GFCI outlets test correctly, confirm exhaust fan operation
- Caulking: Tub/shower perimeter where fixtures meet tile; around toilet base; vanity-to-wall gap
- Hardware and accessories: Towel hooks, toilet paper holder, shower curtain rod or glass door installation
- Final inspection: The building inspector returns to verify all permitted work is complete and code-compliant
- Punch list: Walk the bathroom with your contractor; note any items that need touch-up or correction
- Final payment: Withheld until punch list items are complete
Full Project Timeline at a Glance
| Phase | Duration | Key Dependencies |
|---|---|---|
| Planning and design | 1–2 weeks | Material lead times; contractor availability |
| Permits | 3 days – 3 weeks | Municipality processing speed |
| Pre-demo prep | 1 day | Permits in hand |
| Demolition | 1–2 days | Add 1–3 days if mold or rot found |
| Rough-in plumbing and electrical | 2–4 days | Open walls required |
| Rough-in inspection | 1–2 days | Inspector availability |
| Framing, insulation, backer board | 2–3 days | Inspection sign-off |
| Waterproofing | 1–2 days (plus cure) | Backer board complete |
| Tile installation | 4–6 days (plus cure) | Waterproofing cured |
| Drywall finishing and painting | 3–4 days | Can overlap with tile cure |
| Fixture installation | 2–3 days | Paint cured; tile cured |
| Final connections and inspection | 1–2 days | All fixtures set |
| Total | 3–6 weeks | No major surprises |
What Goes Wrong When Steps Are Out of Order
These are the most common sequence errors and what they cost to fix:
- Tiling before waterproofing cures: Waterproofing membrane is compromised; tile must be demolished and reinstalled. Cost: $3,000–$8,000.
- Installing fixtures before painting: Minor but adds masking time and risks paint on finished fixtures. Cost: $200–$500 in extra labor.
- Closing walls before rough-in inspection: Inspector requires wall removal to verify work. Cost: $500–$2,000 in drywall rework plus re-inspection fees.
- Setting toilet before finish floor tile: Toilet must be removed to tile around it, then reset — two wax rings instead of one. Cost: $200–$400 in extra plumber time.
- Skipping permits entirely: Discovered at resale; buyer’s inspector flags unpermitted work. Cost: $2,000–$15,000 to open, inspect, and re-close all affected assemblies, plus permit fees and potential fines.
When to Hire a General Contractor vs. Self-Managing Subs
For a full bathroom remodel involving plumbing, electrical, and tile, the options are:
General contractor (GC): Manages all trades, pulls permits, coordinates scheduling. Adds 15–25% to total project cost in management fees. Best for: first-time remodelers, complex projects, homeowners without time to manage.
Self-managed subs: You hire and schedule each trade separately. Can save 15–25% but requires significant time investment — expect 8–15 hours of project management per week. Best for: experienced homeowners with scheduling flexibility and existing trade relationships.
In either case, the trades themselves (plumber, electrician, tile setter) should be licensed and insured. The work they do is inspected by the building department regardless of who manages the project.
Bottom Line
A bathroom remodel done in the right sequence finishes on time, passes inspection, and performs for decades. The same project done out of order — even by just a few steps — creates cascading rework that erases any time saved. The sequence isn’t arbitrary: it follows the physical dependencies of the work, the requirements of building codes, and the cure times of materials.
Plan thoroughly before demo begins, pull permits before touching a wall, and don’t let anyone tile before the waterproofing is fully cured. Those three rules account for the majority of costly bathroom remodel mistakes.
See our cost breakdown guide for what to budget at each phase.
Deep Dive: More on Bathroom Remodel
10 Bathroom Tile Trends for 2026: What's In and What's Out
The top bathroom tile trends for 2026 — from zellige to tile drenching. See what's trending, what it costs, and which styles have staying power.
How to Choose a Bathroom Vanity: Sizes, Styles, and What to Look For
A complete guide to choosing the right bathroom vanity. Covers sizes, materials, countertops, sinks, and costs for every budget.
How Long Does a Bathroom Remodel Take? A Timeline Guide
A bathroom remodel takes 2-8 weeks depending on scope. See phase-by-phase timelines, common delays, and how to keep your project on track.
Best Tile for Bathroom Floors: A Complete Comparison Guide
Choosing bathroom floor tile? Compare porcelain, ceramic, natural stone, and vinyl by cost, durability, water resistance, and maintenance.